
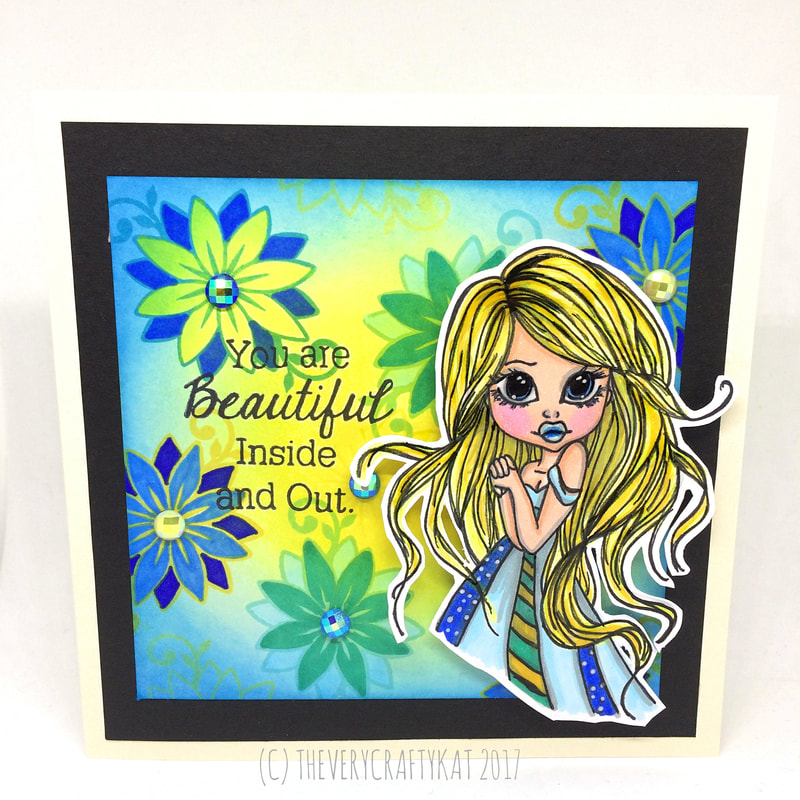
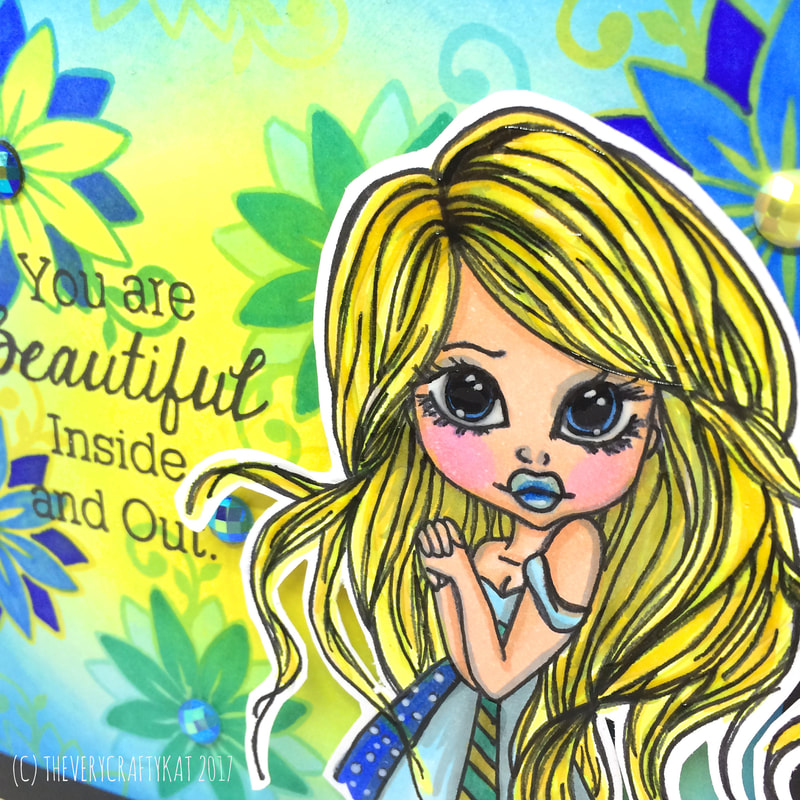
 When you think of the word "handmade", what springs to mind for you?
For me, when I think of handmade, I think: "time", "love", "originality", "quality", "support", "family" and "art", Sure, handmade stuff might be less than perfect, but who wants a piece of original art that looks like it's been mass-produced by machines? No matter what the nature of the handmade product is, it's ultimately a piece of art in its own right. Think about it - someone has spent years, perhaps even decades, perfecting their skills, learning new techniques, investing in supplies. Whether that's an artisan candle maker, a toy crocheter or a maker of handmade cards, each item is made with love, care and attention to detail. Each item takes precious time to plan, create and then promote. These aren't some items made by machine at 100 items/hour, being packed by underpaid workers in a conveyor-style setup and shipped off en-mass to be sold for small change. These aren't items that thousands of other people have also purchased and now have on display in their homes. Who wants to be just like everyone else? Every single handmade item is going to be different from the next, regardless of how uniform we try to keep them (originality and personality!). Each item is being made by one pair of hands, in someone's home office, on someone's dining room table, in their shed. Each dollar made through the sale of their handmade items means a real person (not a big corporation) gets to buy some more supplies, feed their family, save for a holiday, invest in more skill training. Real people, looking after real homes, real families, dealing with real health issues, perhaps. Their days are filled with hours upon hours of working on their craft, perhaps being paid below minimum wage for their time (when compared to being employed by someone else). It means late nights, hasty postal runs, an overflow of creative ideas as you lie there trying to get to sleep, having to navigate your own marketing and promotions, writing original blog posts, researching what your customers want, dealing with creative block and the challenges that poses. Why do we do it then? Because we're artists, and that's what we do. The love of the craft far outweighs any of the "downsides". The creation of art in any form is a therapy for most of us. It's an extension of our very personality, and without it, we have a void we cannot fill. That's why we need to do what we do, and we don't really mind all the harder stuff. All we want to do is CREATE. To INSPIRE. To bring JOY to others. To create a little OASIS in amongst the chaos of this world. Next time you see a handmade artisan online, at the markets, on the streets, take a moment to step back and appreciate their work and, if the opportunity arises, ask them what their inspiration is. Trust me, it will mean the world to them! xo Kat
0 Comments
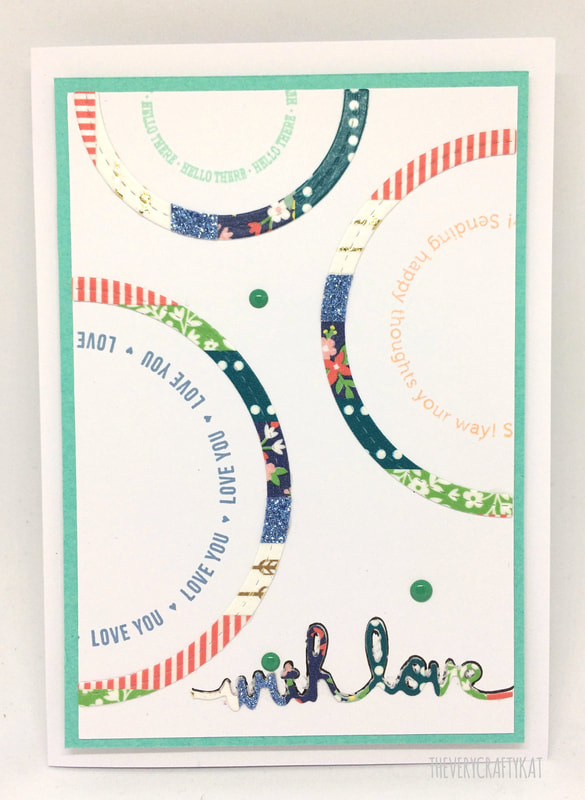
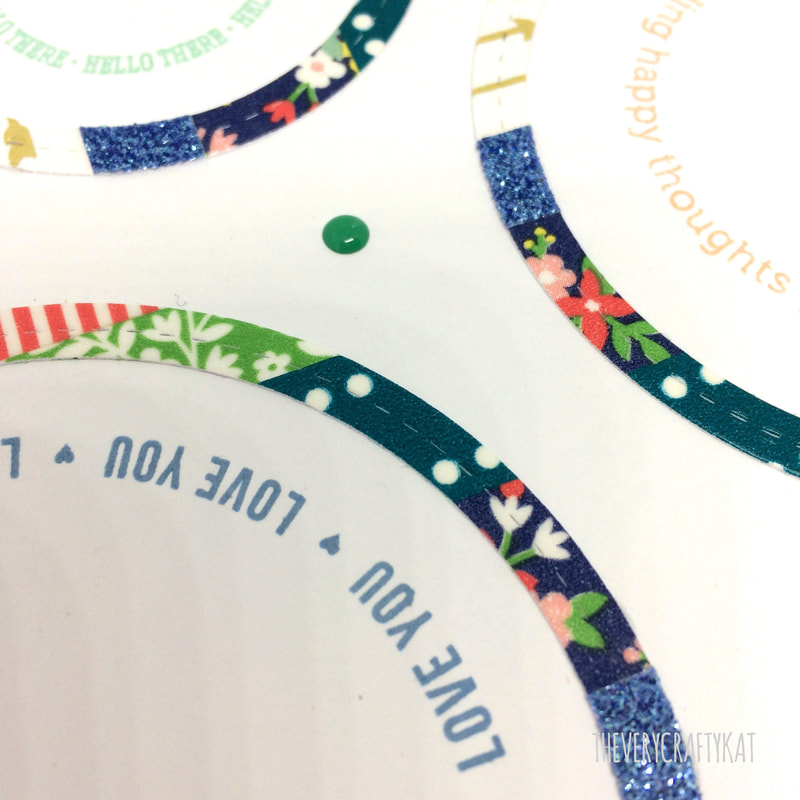
Due to my lack of self-inspiration, I've been on the Challenge bandwagon of late. Here's 3 more challenge entries I've created today! I hope you enjoy them :) Challenge #1 -Washi TapeHere's my Washi Tape entry for the CAS on Friday's Challenge #121. I decided to do something a little different using my washi tape for this challenge. Using strips of different style washi I'd adhered to a plain scrap piece of card, I used a generic metal die (Rainbow design). The die I used cuts it through enough that each rainbow 'strip' is able to be separated. I simply used the rainbow strips to create semi-circles of varying sizes in the design. With the left over piece of washi-decorated card, I cut out the sentiment using a word die. Adding some stamped sentiments and some enamel dots to finish, I'm quite please with the overall concept of this card!
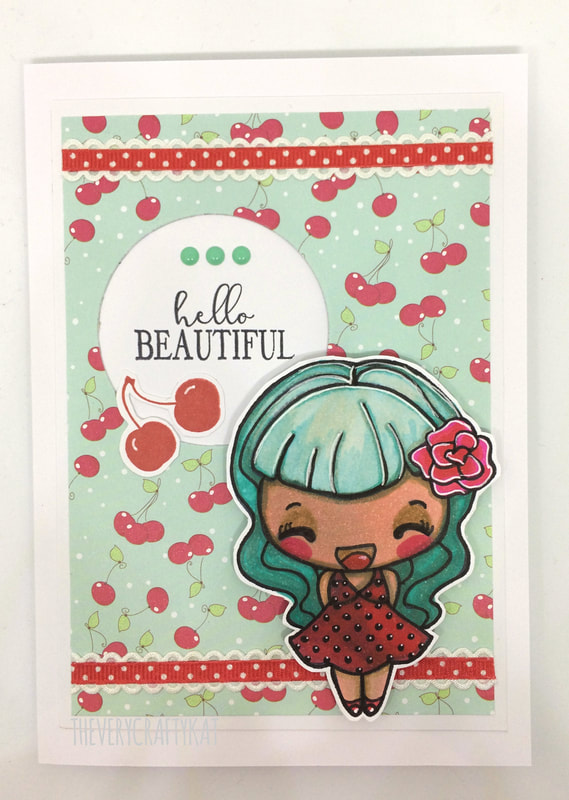
Challenge #2 - 'R' Theme Here's the idea I've come up with for Just Add Ink's #386 Just Add 'R' Challenge! My theme is 'Retro'! Just because I love all things Retro, and I especially adore this cute Flirty Anya stamp from The Greeting Farm! I coloured her in using various alcohol ink markers, and used up some cute cherry-themed paper for the background.
Challenge #3 - Alphabet Challenge Here's my entry into the Alphabet Challenge Blog's 'R for Roses' challenge. A little different to the standard 'rose' colourings of red and pink. I went for kind of a vintage/distressed feel, using mostly greens. I used Kaisercraft patterned paper as the basis for my card. Inked up with Distress Inks and used some green floral washi for a border. 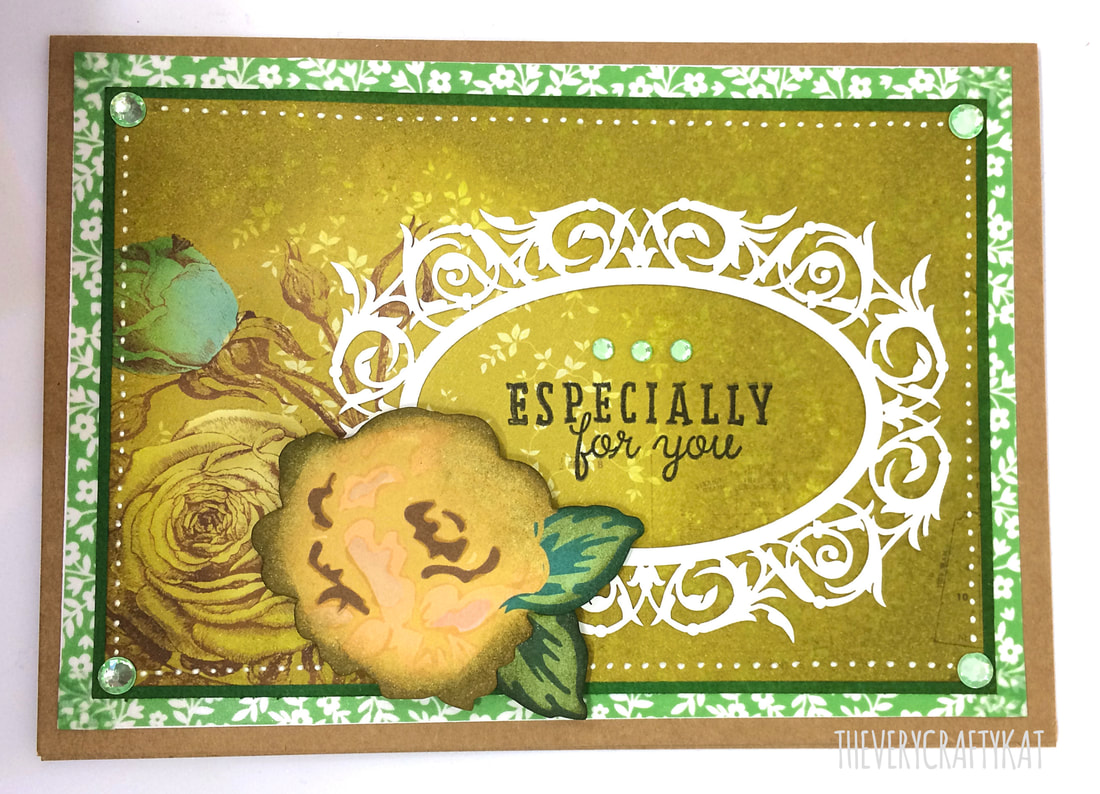 This week, I've decided to participate in a few more blog challenges to help my creativity keep up some momentum! I hope you enjoy this week's entries :) 1. MFT Color Challenge #81
My entry into the MFT (My Favorite Things) Color Challenge. I used my alcohol inks to create the abstract panel, then embossed it using a hexagonal design. The background I stamped up using designs from Simon Says Stamp and my Ranger Archival inks. Embellished with die-cut glitter cardstock, washi tape and die-cut sentiment. Here's the colours we were given to work with. I rather like the combination myself!  2. CAS on Friday |


 |  |
3. Just Add Ink Challenge #385 - 'Sketch'
My third and final Challenge entry completed today was for the Just Add Ink #385 Sketch Challenge. Sadly, I missed the entry deadline by about 45mins! But I thought I'd still post this for fun :)
A 'sketch' is a base template from which you create your layout. It can be interpreted any way you like, as long as the base elements are all present on your finished project. Here is the sketch provided in this challenge to base my card off.
 | To create my floral card, I used up some pretty paper I received as part of a magazine freebie. I embellished with washi tape and pink twine. The sentiment is from Hero Arts. I finished the look with a hand-drawn dotted border using my grey Bic marker. |

My goal is to continue entering these fun challenges over the next few weeks and months. Challenges are a great way to get your mind working, thinking outside the box and having fun sharing your ideas with others as well as seeing other's interpretations of the challenge!
I hope you like my ideas and can be inspired as well :)
Until next time,
xo Kat
I hope you like my ideas and can be inspired as well :)
Until next time,
xo Kat
After being away on holidays for a week, and then being confined to bed for another week when I came home sick, my crafting was non-existent during this time, and I was getting withdrawals.
What to do when you NEED to do something creative but you have no specific projects you need to complete?
Search online for card challenges of course!
This week I decided to participate in 2 challenges.
1. Just Add Ink #384 - "Inspiration"
http://just-add-ink.blogspot.com.au/
Here's my card inspired by the image given. I wanted to do something a little unique and something bright.
I just love my new stamp from Saturated Canary - 'Breezy'. I coloured her in using my Chameleon markers, then went over and highlighted her hair and eyes and part of her dress with Glossy Accents. The background I stamped using my Archival inks, coloured in with Chameleon markers then inked over the top with Distress Inks.
 |  |
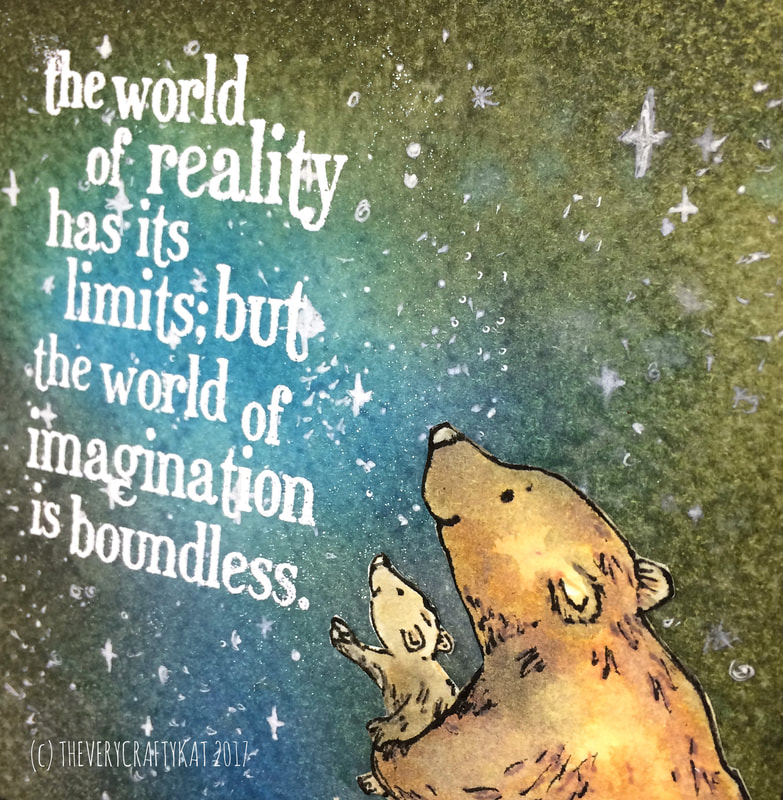
2. Crafty Catz #391 - "Anything Goes - BEARTASTIC" http://craftycatzweeklychallenge.blogspot.com.au/
Here's my "anything goes" card, which included the optional "Beartastic" theme.
I watercoloured the bears with my Distress Inks and created the night sky background with my beloved inks as well! Heat embossed the quote stamp from Tim Holtz and added "stars" using my Gellyroll pen.
Here's my "anything goes" card, which included the optional "Beartastic" theme.
I watercoloured the bears with my Distress Inks and created the night sky background with my beloved inks as well! Heat embossed the quote stamp from Tim Holtz and added "stars" using my Gellyroll pen.
 |  |
I hope you like my creations!
Until next time,
xo Kat
Until next time,
xo Kat
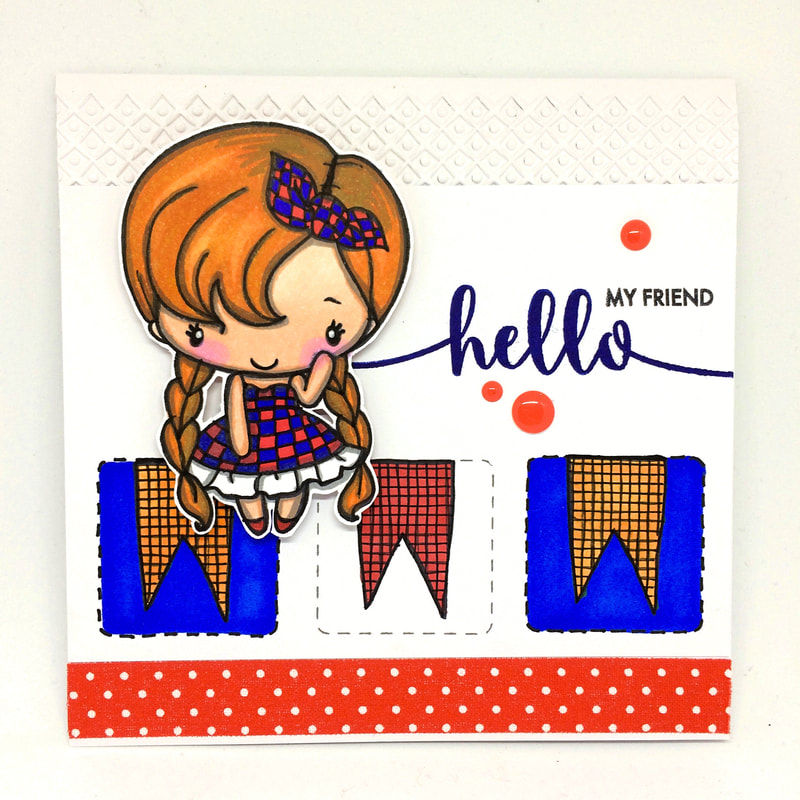
To celebrate STAMPTEMBER, I thought I'd join in the fun of Simon Says Stamp's weekly challenge.
This week's challenge is 'Clean & Simple'.
Here is my entry! Enjoy :)
xo Kat
Instagram: #ssswchallenge
Stamps used: The Greeting Farm 'Do Si Do Anya', Avery Elle sentiment, Simon Says Stamp 'Dash Line Shapes' & Kaisercraft banner stamp.
Other materials used: Versafine Ink, Archival ink, Embossing folder, Chameleon markers, BIC fine markers, fabric tape, enamel dots.
Hi guys,
So, I've been a bit quiet of late on here (that's because I'm a PROCRAFTINATOR).
What is a Procraftinator, you may say?
Well, it's the inability to get your butt moving because you have so many pretty crafty ideas to create that everything else falls by the wayside (my blog is a victim of my procraftination).
But, I am RESOLVED to get the ball rolling once again.
I recently attended a fantastic Digital Marketing seminar in Sydney which really gave me a boost and a fresh outlook on my business.
After many months of apprehension (due to the fear of failure), I've finally created an online store via madeit.com.au.
After a pretty big setback business-wise, I've decided that if I'm determined enough, I can make anything work to my advantage.
So, what's the take-away point to my ramblings?
REGARDLESS OF WHAT YOUR CIRCUMSTANCES MAY DICTATE, YOU ARE THE DICTATOR OF YOUR OWN DETERMINATION.
If you are DETERMINED to make a success of yourself, you can do it.
Like the wise woman Lo 'Real once said, "It won't happen overnight, but it WILL happen..."
For anyone out there struggling with their own hangups, focus on WHAT YOUR GOOD QUALITIES ARE. Trust me, the good will far outweigh the bad if you truly look at yourself through another's eyes. Don't listen to that voice in your head that tells you you're not good enough. That voice is there to sabotage your efforts. YOUR MIND is the main saboteur in the story and you need to put that baddy behind bars for good!
From one procraftinating saboteur to another,
We can DO THIS!!! (but maybe after I've finished this project :p)
xo Kat
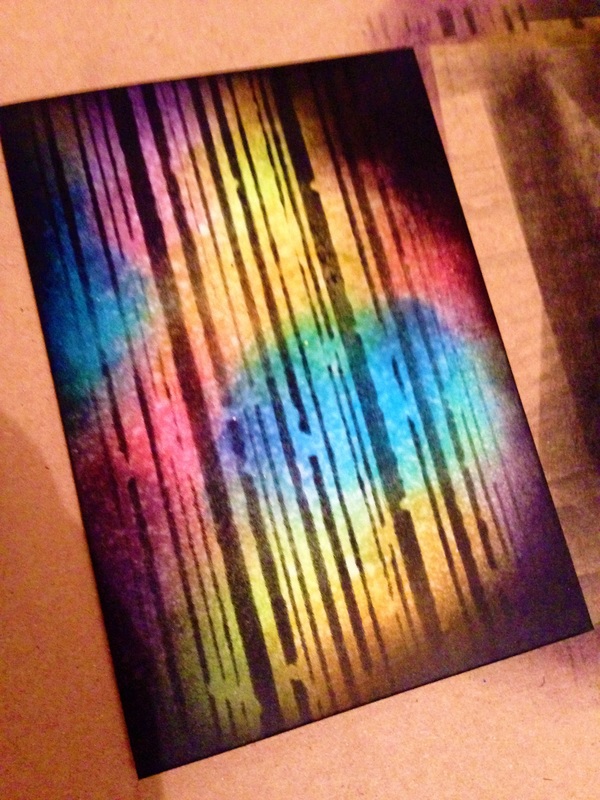
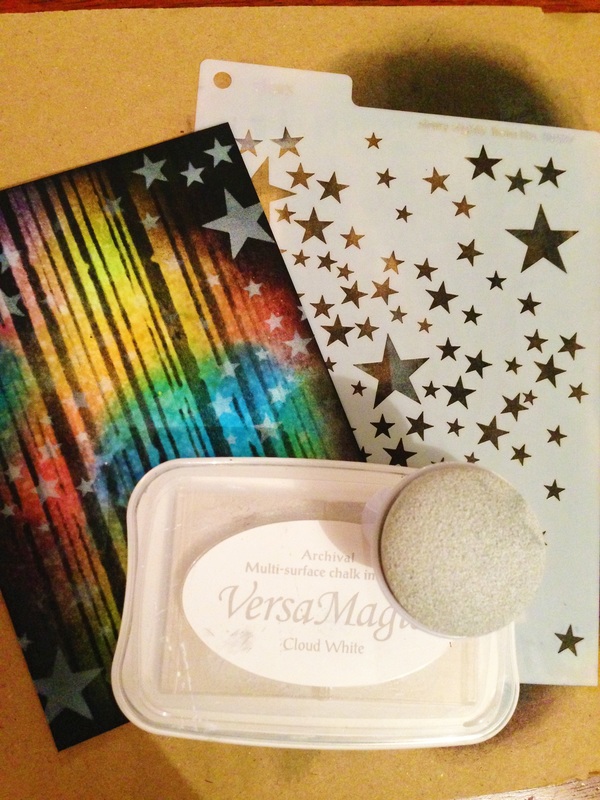
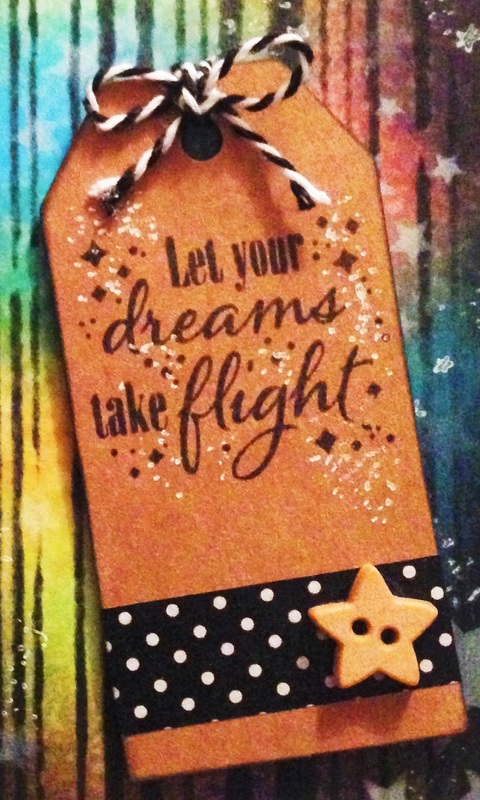
| Hi guys! I was very fortunate to be chosen as one of the runner ups for the latest Australian Simply Cards Cardmaker of the Year competition, and due to popular demand, I thought I'd create a tutorial on how to re-create one of my winning cards! Besides winning $300 worth of crafty goodies, it was a privilege to be featured in the May edition of Australian Simply Cards. I call this one Rainbow Stardust and I hope you enjoy re-creating it! Apologies for the low-quality photos - I only have my iPhone camera! xo Kat Rainbow Stardust Card  Tutorial1. Start with the piece of white cardstock. Using the applicator tool, sponge each of the distress ink colours onto the cardstock until completely covered, starting with the lighter colours and building up & blending with the darker shades. Spritz the card all over lightly with water using a mini mister or similar, to get a mottled effect. 2. Layer the Tim Holtz stencil over the inked background, and use the applicator tool to pounce over the stencil with the Black Soot distress ink, ensuring you alternate between heavy and light pouncing - you don't want to cover the entire stencil with solid black, leave some lighter parts/uninked sections. 3. Using the Black Soot distress ink, ink around the edges of the background, inking more heavily around the corners and leaving some lightly inked edges. This will really make the background pop! 4. Once dry, layer the stars stencil over the background and pounce around the stencil with the white Versamagic ink, focusing mainly around the edges, like a frame. 5. Using the white gel pen, doodle random small stars around the background, adding trails of little stardust in clusters. 6. Once you have created and mounted the tag (see below instructions), adhere the background to the card base using double-sided tape and voila! For the tag: Stamp the 'Let your dreams take flight' sentiment on the top half of the tag in black ink. Using the white gel pen, add some sprinkles of stardust and clusters around the sentiment. Adhere a strip of washi tape across the bottom of the tag (leaving a few millimetres of the tag exposed), and glue the star button on the right of the washi tape strip. Tie a bow of the twine through the tag hole, then mount the tag onto the card using the 3D foam. |  My winning entries featured in the May 16 edition of Simply Cards Australia 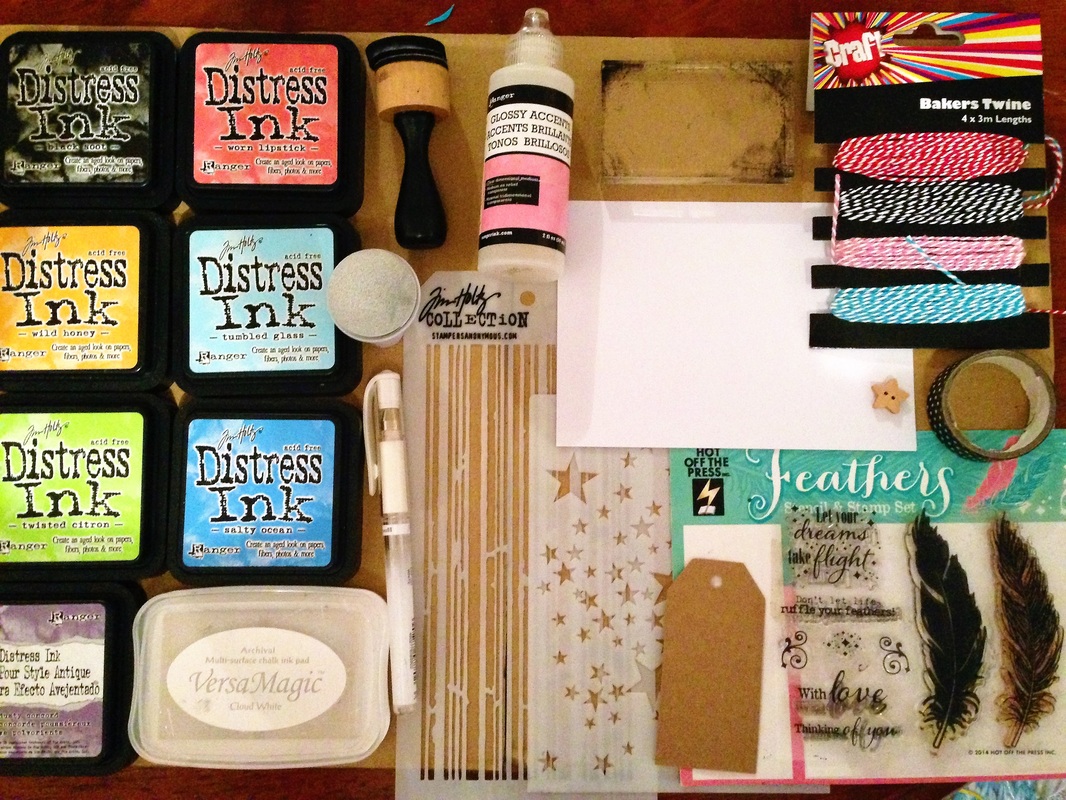 Materials
|


Hi everyone, just a little update to what's been happening in my very crafty world!
Firstly, I'm very excited to share with you that I was recently published in Australian Simply Cards Magazine!
I was honoured to receive a ' Highly Commended' title for my entry into their annual Cardmaker of The Year competition.
I plan to enter again this year and hopefully win first place or a runner-up spot! The winner not only receives $3,000 worth of crafting goodies, but they also get to have their own regular spot in the magazine - what an exciting prize!
I did not expect any mention at all, as my entries ended up being quite rushed. I'm hoping this year I can put sufficient time into preparing my entries. I know I didn't reach my full potential with my entries, but I did the best I could with the time frame I had!
What has this experience taught me? Don't doubt your abilities, just have a go. If you are doing something you love, you will never feel disappointed whatever the outcome!
Secondly, I was able to attend the Australian Papercrafts Festival in Penrith NSW at the beginning of May, and I picked up lots of great new items to add to my craft stash! I really love watching new techniques and seeing new products. Something I've only recently been getting into is using stencils. There's such a wide range out there, and with inspiring tutorials from crafty experts such as Tim Holtz, there's endless techniques and mediums you can use with them!
And thirdly, I've been working with my beloved alcohol inks to create beautiful original artworks. I absolutely love my alcohol inks, and I can't wait to use this medium more and more. I'm currently working on a large abstract artwork I've been commissioned to create, and hope that this will set a precedence for future artworks!
Just some little updates from me for now! Thanks for reading :)
xo Kat

Washi Tape - you may have heard of this fantastic little product - or maybe not! Whichever is true in your case, what's for certain is that this product is AMAZINGLY simple to use in a variety of ways - from papercrafts, to decorating household items, stationery and even furniture, washi comes in an almost endless variety of colours, patterns and widths.
Let me show you why I LOVE my washi tape!
1. It's super simple to use.
Washi comes in small rolls like sticky tape. It's self-adhesive, which means you don't have to worry about glues or double-sided tape. It's adhesive is strong enough to adhere to any surface you want, but not so strong that you can't gently peel it away to reposition if you need to. If you try to peel it off a paper surface, it may slightly rip, but it's not too bad.
Another plus of the washi tape is because of the material it's made from, you can simply tear it off with your fingers without having to use scissors. You can see from the example on the left that this 'torn' tape look can also become a part of your design (this card design was inspired from Pinterest).
2. The variety of colours and patterns means you can match your washi to almost anything!
When I use washi tape on my cards I can always match the colours and/or patterns to other embellishments e.g. in the examples below you can see how I've matched the various buttons with the washi tape colours. If decorating furniture or household items, you can also match washi tape to your decor/colour scheme. It's so versatile!

3. It's cost effective and a great way to incorporate pattern, colour and interest to all of your projects.
Washi tape is cost effective to use. I buy a lot of washi off eBay stores for around $1.50-$2.80 per roll (usually 5 or 10 mtrs). Stores like Typo sell washi tape also, but at a much higher price.
I recommend buying off eBay if you can!
Because of its value for money, washi tape is an inexpensive way to add pops of colour into all of your projects without breaking the budget.
| Ways to use Washi Tape! There are a bazillion ways to use washi tape! If you search 'Washi Tape' in Pinterest, literally hundreds of ideas will pop up. Here's a few great ideas to get you started: 1. Customise your tealight candles! Simply adhere a strip of washi around the tealight candle case to make 'em pretty :) 2. Decorate a vase or glass bottle with multiple strips of different patterned washi tape in a matching colour scheme. If you get sick of the pattern or change your colour scheme, simply peel off and start with a fresh design! 3. Customise your calendar/diary with strips of washi tape instead of using a highlighter. So much prettier! 4. Use washi at your next party or event - wrap a piece of washi around the top of a toothpick and cut into a little flag for use in cupcakes or finger food. You can also use washi as a tie for favour/treat bags, to decorate plastic spoons, cups and more! 5. Cover a blank notebook with strips of washi tape for a unique and cute design! I hope that this blog has helped inspire you to try this great product - go out and get creating! xo Kat |  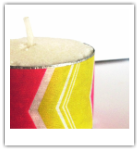 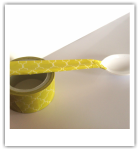 |
| |
Author
By Kat
Archives
December 2017
November 2017
September 2017
March 2017
May 2016
May 2015
March 2015
 RSS Feed
